The Security Group acts as a virtual firewall, controlling the traffic flowing in and out of your EC2 resource associated with it.
VPS when created have default security groups, we can add additional security groups as per our requirements.
Security Groups operate at the instance level, whereas ACL acts over VPCs. Security Group supports allow rules only and are Stateful.
Security Groups consist of rules, which control traffic based upon protocols and port numbers, there are separate sets of rules for inbound and outbound traffic.
Security Groups allow you to restrict those rules to a certain IP CIDR range or you can allow traffic to all, 0.0.0.0/0 (IP4) and ::/0 (IP6)
We can create a Security Group through various methods, including AWS console as well as using IaaC (Infrastructure as Code).
Create Security Group through AWS Console
- Login to your AWS Console, and navigate to VPC or EC2 service.
- Click on the Security Group on the left navigation bar. All existing Security Groups will be listed.
- Click on Create new Security Group, and enter the Security Group Name and Description.
- Add the Protocol, Port, CIDR Range, etc., and click on save.
That’s it and your security group is created through GUI, now we will learn how we can use IaaC to create a Security Group in AWS using Terraform.
Create Security Group through Terraform (IaaC)
In our example, we will create a Security Group for the LAMP server and will allow traffic for ports 80 (HTTP), 443 (HTTPS), 22 (SSH), and 3306 (MySQL).
We will be creating a Security Group using different methods,
Method 1
In Method one let us go in the simplest way, we will have multiple blocks of ingress rules.
Files to be created
- data.tf
- variable.tf
- provider.tf
- securitygroup.tf
Provider.tf, Let’s update the Terraform provider information, so Terraform knows which cloud provider we are using. The provider files contain two blocks Terraform and Provider.
// Terraform block,define the provider source and version
terraform {
required_providers {
aws = {
source = "hashicorp/aws"
version = "~> 3.0"
}
}
}
// Define provider
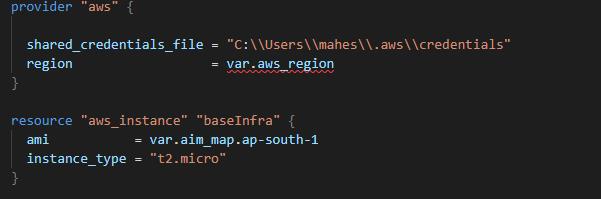
provider "aws" {
shared_credentials_file = var.shared_credentials_files
region = var.region
profile = var.profile
default_tags {
tags = {
"Resource" = "Security Group TF"
}
}
}
// local variables, can be referenced
locals {
common_tags = {
"Project" = "TF Modules"
"Owner" = "CubLeaf"
"WorkSpace" = "${terraform.workspace}"
}
}
Variables.tf, declare the variables used in the configuration. These variables are also named input variables.
variable "region" {
  description = "Enter the region"
  default     = "us-east-1"
}

// update the path of credential file
// replace the below path with your credential file
variable "shared_credentials_files" {
  description = "Enter the credential file"
  default     = "C:\\Users\\username\\.aws\\credentials"
}

// Enter the profile of aws you want to use
variable "profile" {
  description = "Enter the profile name"
  default     = "myprofile"
}

variable "port" {
  description = "Enter the ports to be configured in SG Ingress rule"
  default     = [80, 22, 443, 3306]
}

variable "protocol" {
  description = "Ports for LAMP Server"
  type        = map(any)
  default = { "80" = "HTTP"
    "443" = "HTTPS"
    "22"  = "SSH"
  "3306" = "MYSQL" }
}
Data.tf, These are return values, in our case we want the default VPC id, to reference it in our security group resource, instead of hard coding we can use the data block to reference the existing resource. It’s very similar to traditional function return values.
// Get the default VPC ID
data "aws_vpc" "get_vpc_id" {
  default = true
}
Securitygroup.tf, The actual resource “aws_security_group” that we are going to create will be declared here,
resource "aws_security_group" "lamp_securitygroup_basic" {
  name        = "LAMP Security Group Basic"
  description = "LAMP Server Security Group Basic ${terraform.workspace}" // call the workspace
  vpc_id      = data.aws_vpc.get_vpc_id.id  // calling from the data block
  tags        = local.common_tags

  // in-bound rules
  ingress {
    from_port        = 22
    to_port          = 22
    protocol         = "tcp"
    cidr_blocks      = ["0.0.0.0/0"]
    ipv6_cidr_blocks = ["::/0"]
  }

  ingress {
    from_port        = 443
    to_port          = 443
    protocol         = "tcp"
    cidr_blocks      = ["0.0.0.0/0"]
    ipv6_cidr_blocks = ["::/0"]
  }

  ingress {
    from_port        = 22
    to_port          = 22
    protocol         = "tcp"
    cidr_blocks      = ["0.0.0.0/0"]
    ipv6_cidr_blocks = ["::/0"]
  }

  ingress {
    from_port        = 3306
    to_port          = 3306
    protocol         = "tcp"
    cidr_blocks      = ["0.0.0.0/0"]
    ipv6_cidr_blocks = ["::/0"]
  }

  // outbound rules
  egress {

    from_port        = 0
    to_port          = 0
    protocol         = -1
    cidr_blocks      = ["0.0.0.0/0"]
    ipv6_cidr_blocks = ["::/0"]
  }
}
Now, as we have the code/configuration ready, let us initiate and create the Security Groupby executing the terraform plan and applying the plan command.